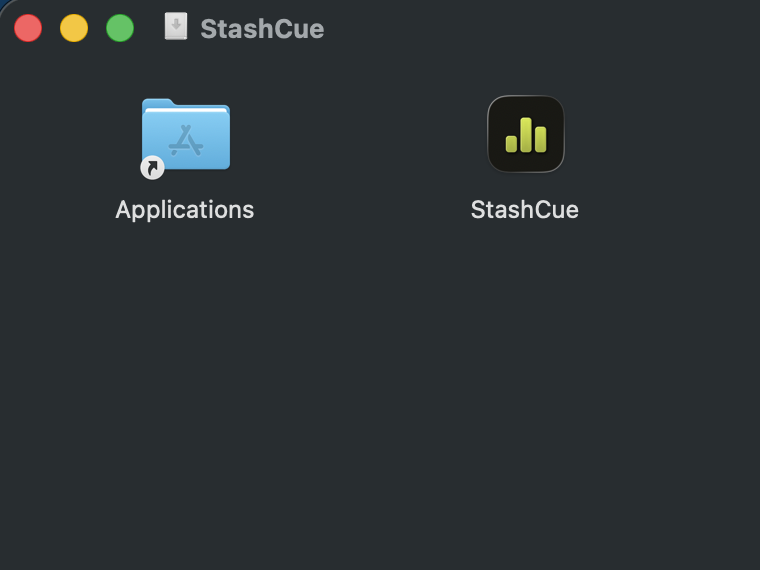
 Screenshot: the disk image, dragging StashCue into Applications
1
Drag it into Applications
Open the file you just downloaded. Drag the StashCue icon onto the Applications folder sitting beside it.
Your first 10 minutes of live interview and 2 screen scans are included — no account, no card, nothing to type. The first time you open it, the app introduces itself and answers a real interview question out loud while you watch.
Loading…
Our signing certificates with Apple and Microsoft are on their way. Rather than hold StashCue back until they land, we would rather you had it today — so the first time you open it, your computer will ask you to confirm that you meant to install something new. Every screen you will see is below, with the exact button to press. You do it once, and never again.
Screenshot: the disk image, dragging StashCue into Applications
Open the file you just downloaded. Drag the StashCue icon onto the Applications folder sitting beside it.
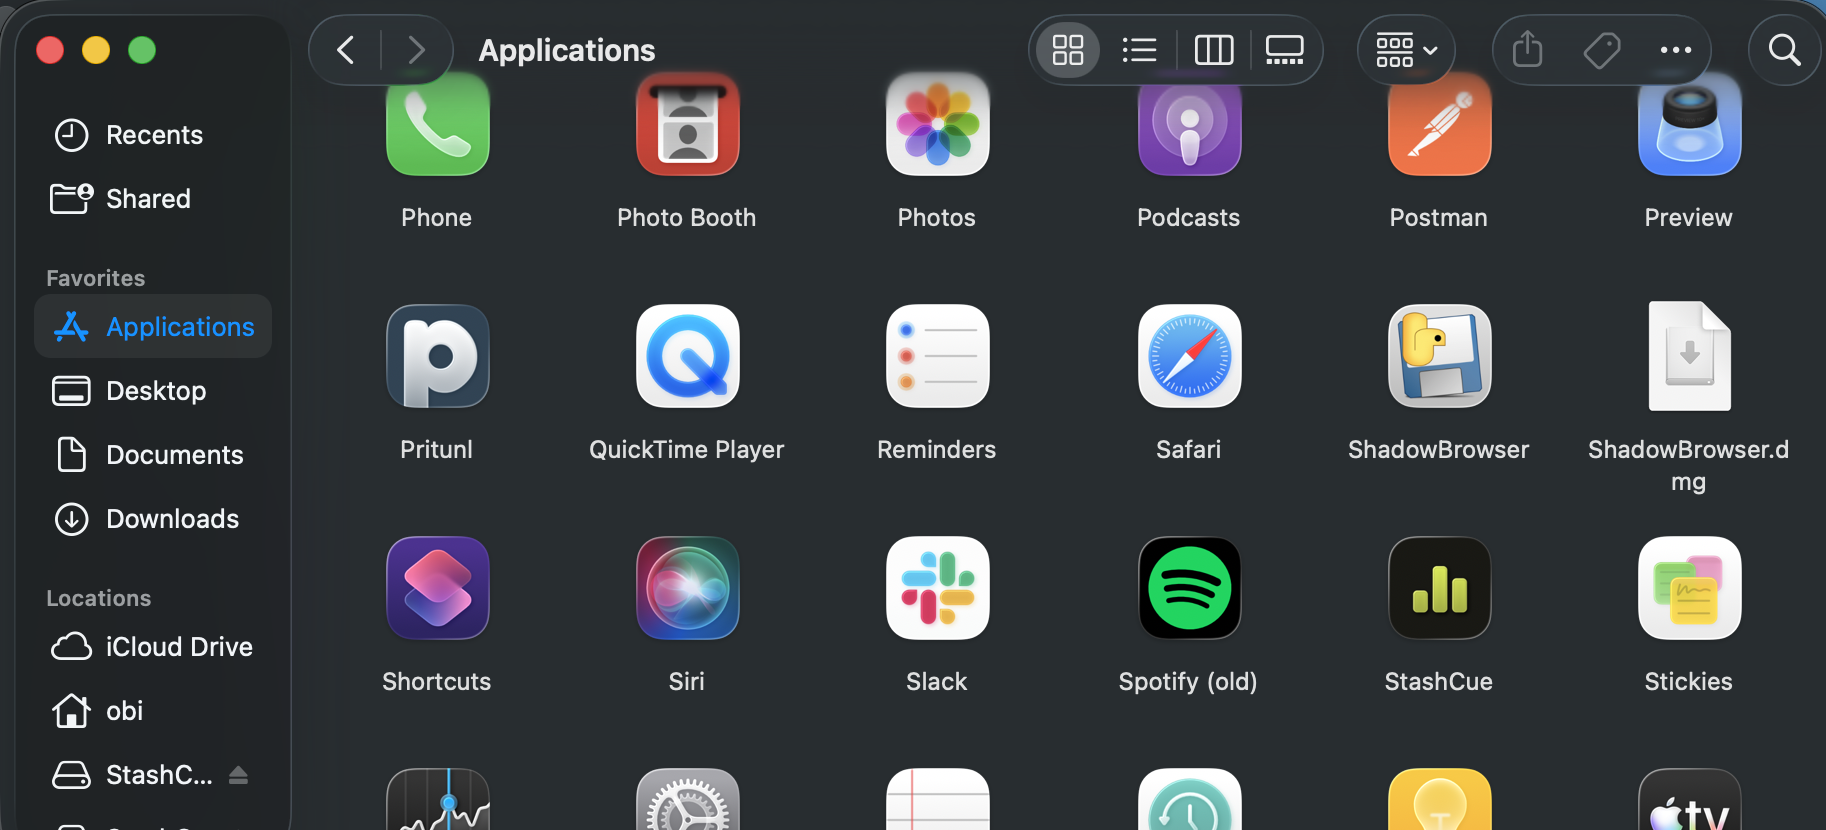 Screenshot: StashCue in the Applications folder
Then open StashCue the way you would open anything else — from your Applications folder.
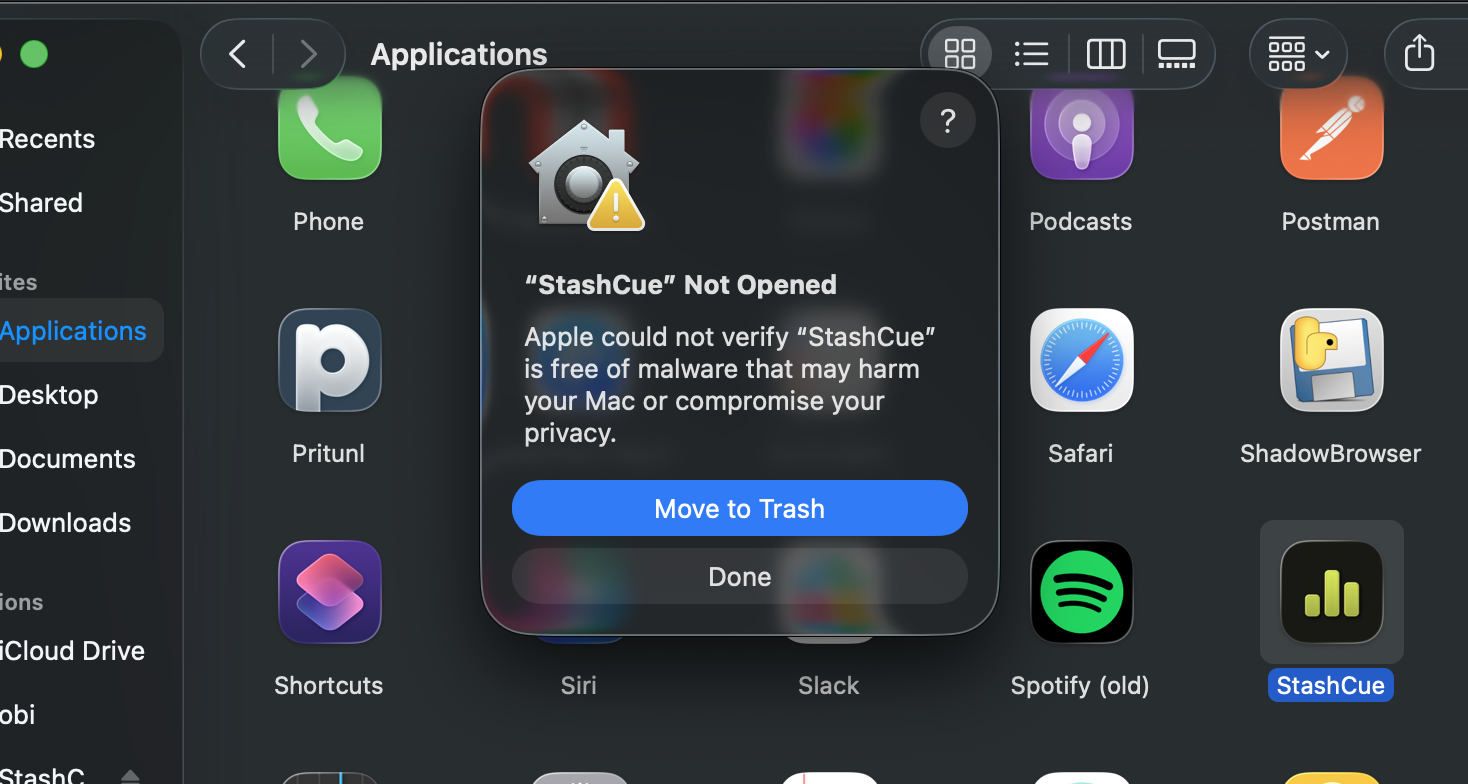 Screenshot: the “Not Opened” dialog, both buttons visible
macOS says “StashCue” Not Opened — it could not verify the app is free of malware. Click Done.
Not “Move to Trash”. That is the big blue button, and it deletes the app.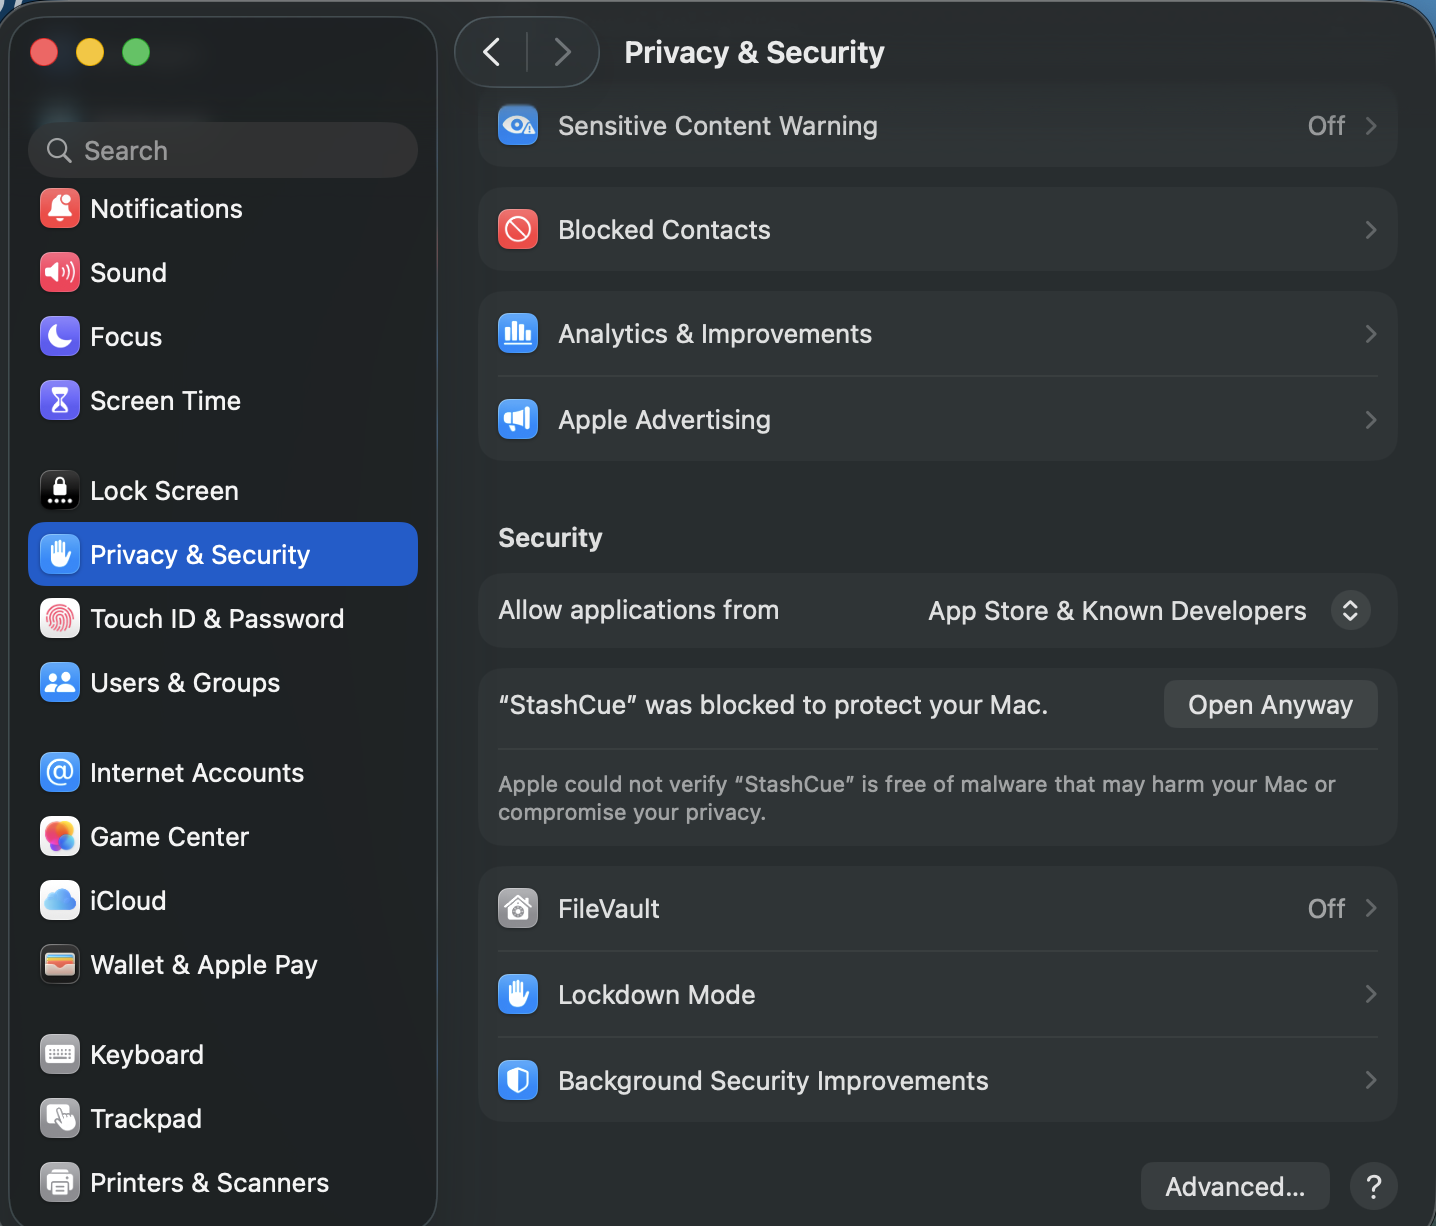 Screenshot: Privacy & Security, the Open Anyway button
Go to System Settings → Privacy & Security and scroll down to Security. There it says “StashCue” was blocked, with an Open Anyway button beside it.
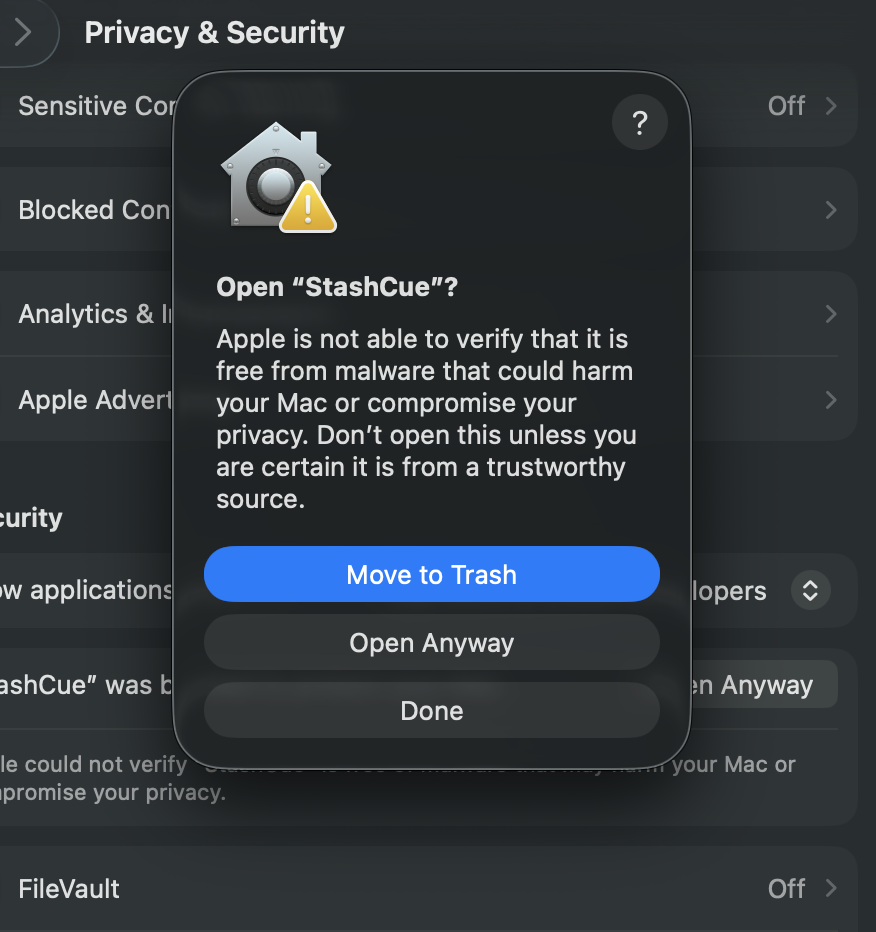 Screenshot: the “Open StashCue?” sheet, Open Anyway
It asks once more, in a dialog of its own. Choose Open Anyway.
“Move to Trash” is the blue button here too. It is the middle option you want, not the top one.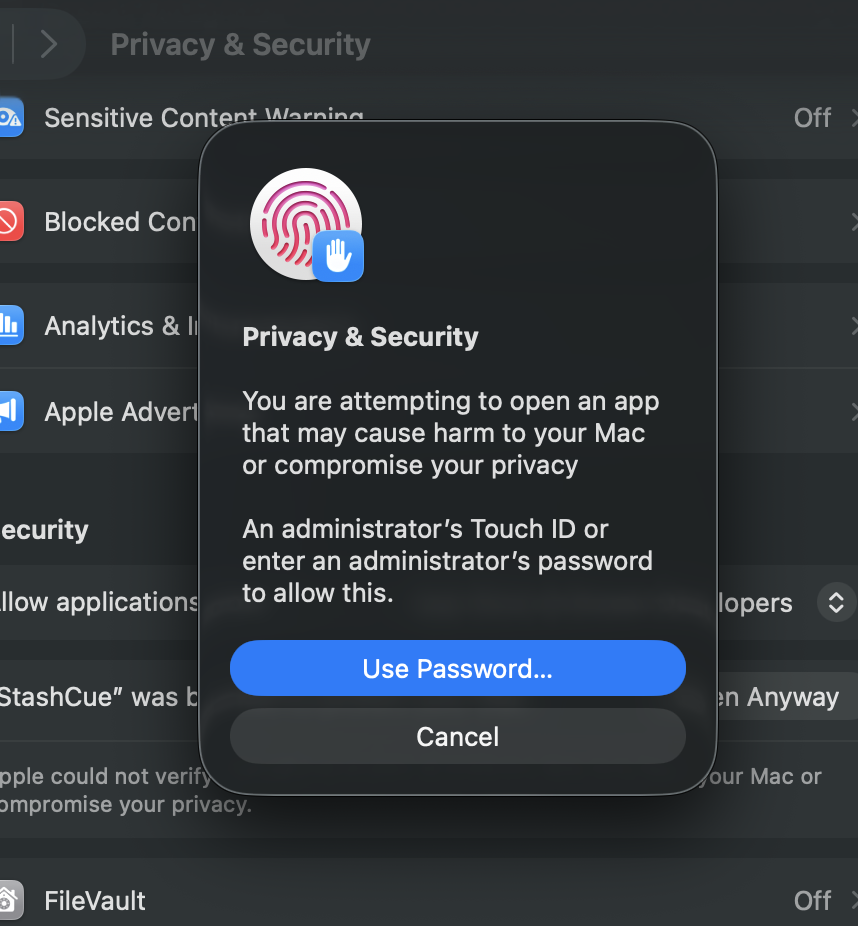 Screenshot: the Touch ID or password prompt
Last gate: your Mac asks for Touch ID or your password, and then StashCue opens. This is your own computer checking that you meant it — nothing is sent anywhere.
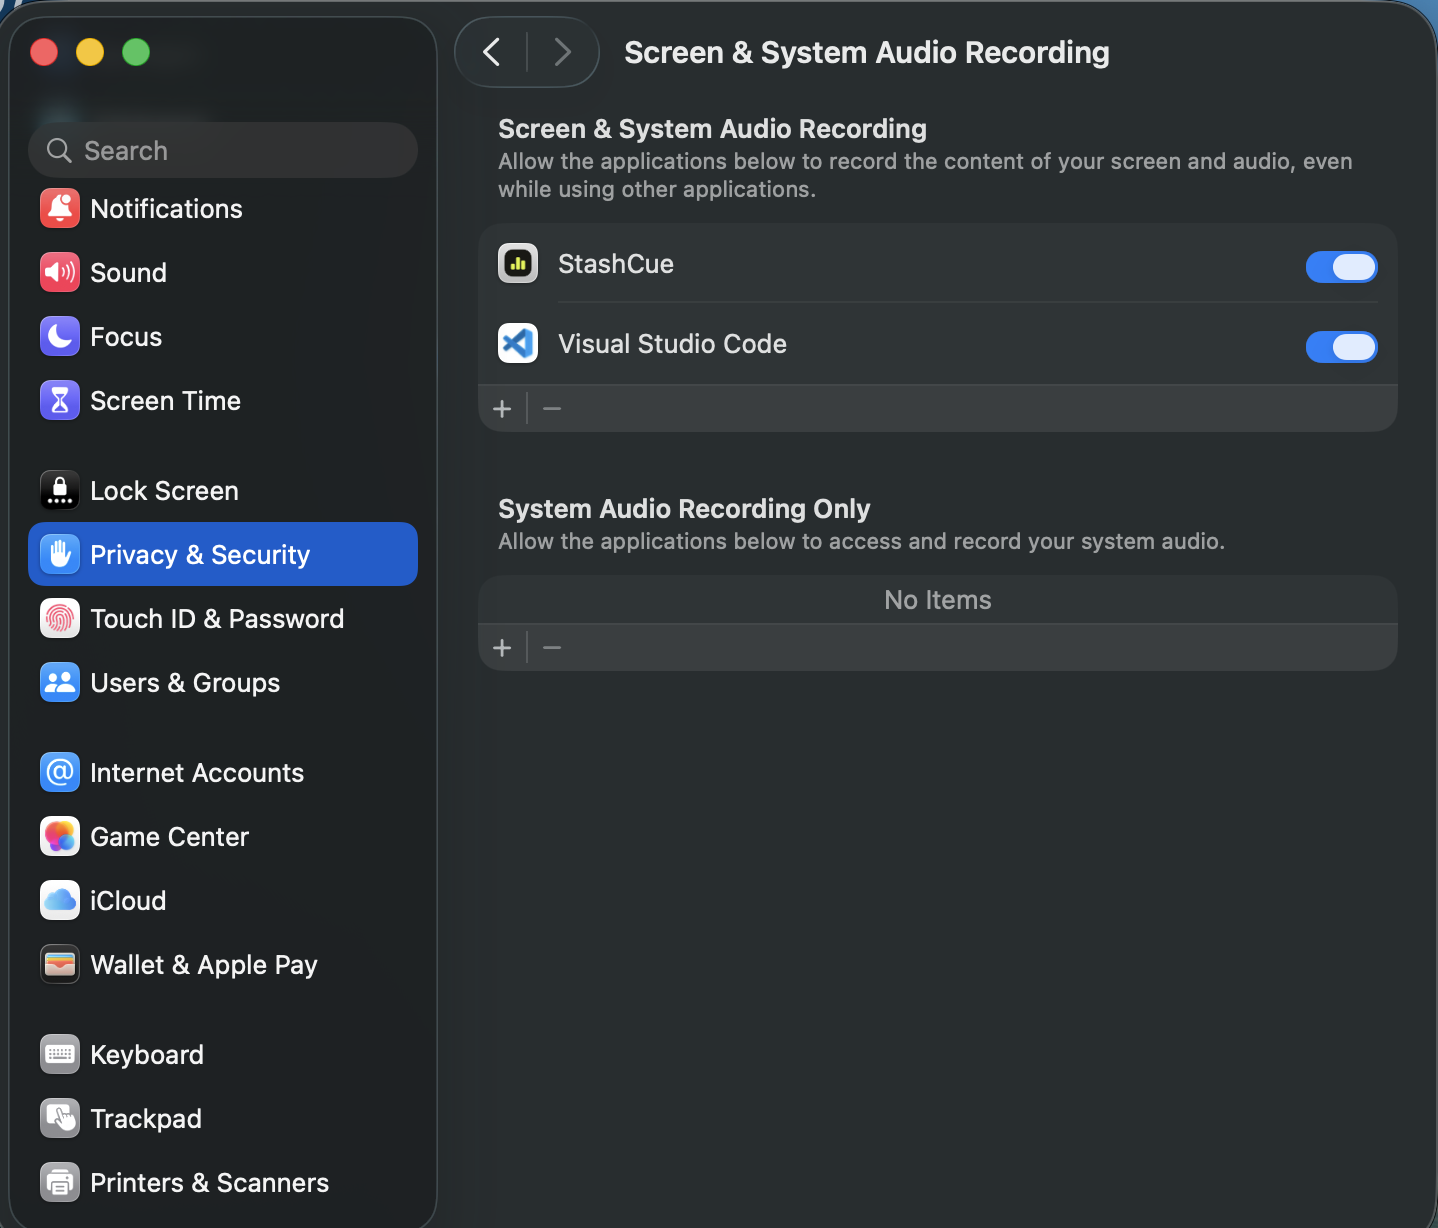 Screenshot: Screen & System Audio Recording, StashCue on
Back in Privacy & Security, switch StashCue on under Screen & System Audio Recording. That is how it hears the question — through your speakers, never your microphone.
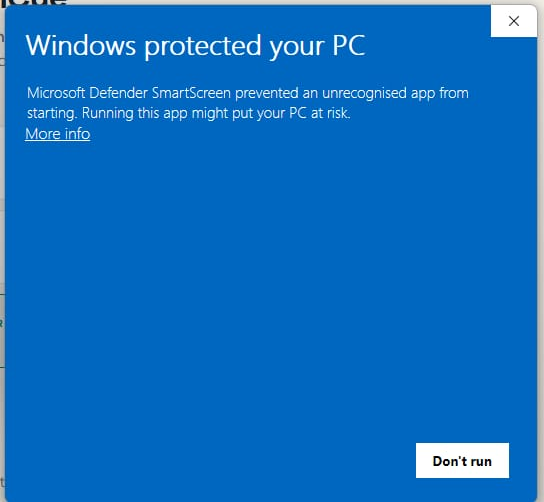 Screenshot: “Windows protected your PC”, before More info
A blue box says Windows protected your PC — Defender SmartScreen stopped “an unrecognised app”. The only button it offers you is Don't run.
Don't press it. Click the small More info link under the message instead — that is the whole trick.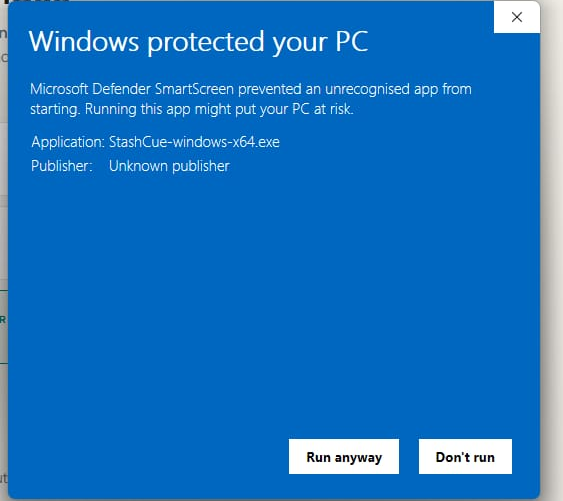 Screenshot: after More info, the Run anyway button
The box now names the file — StashCue-windows-x64.exe — and its publisher as Unknown publisher. That unknown publisher is us: we have not bought Microsoft's certificate yet. A Run anyway button appears beside Don't run.
Run anyway is the left one of the two. Don't run sits where your hand expects the safe button to be.StashCue installs just for you, so Windows never asks for an administrator password. It opens as soon as the installer finishes.
You do this once. After that it opens like anything else on your computer. We are buying both certificates — until then, this page is the honest version of what your machine will tell you.
Once it opens
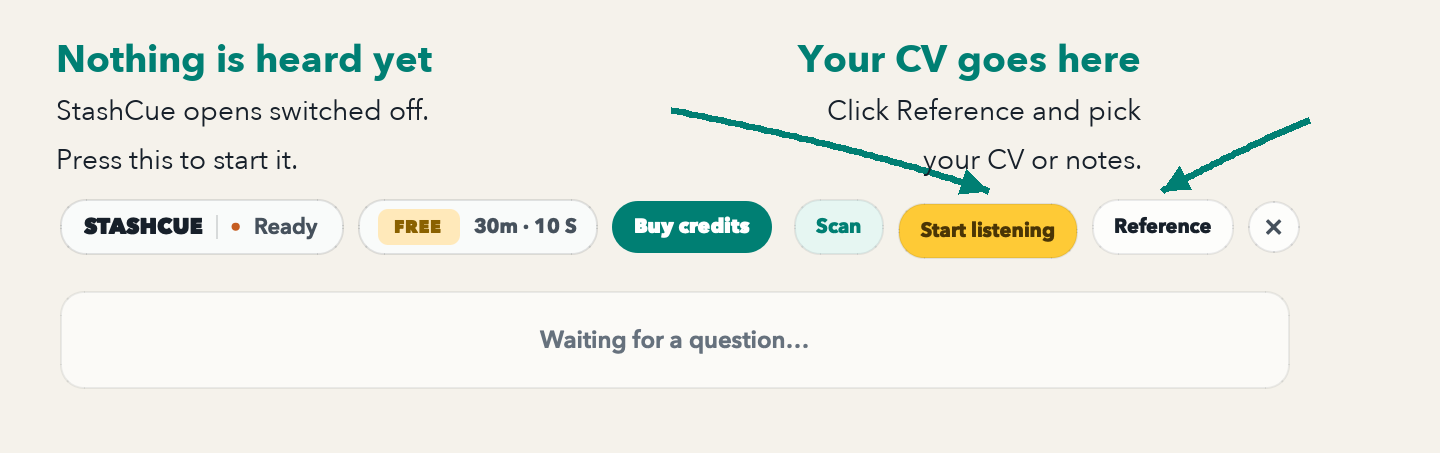
The first run walks you through the bar, asks for your CV, and then plays a real interview question out loud — which StashCue hears through your speakers and answers in front of you, exactly as it will in the interview. It takes about a minute and only ever happens once.
Try it again whenever you like
The walkthrough plays the second of these for you. Here they both are for another go: press Start listening, play either clip, and StashCue hears the question through your speakers and writes the answer in the bar.
Your free credits are there straight away — nothing to set up.
We never keep your recordings or your screen images. See exactly what we do keep, and how to switch it off. Anything else: support@stashcue.com.